Configuring Teams for Azure Virtual Desktop
Introduction
Microsoft announced the General Release (GA) of Microsoft Teams on Windows Virtual Desktop (with media optimisation) on Monday the 27th of July 2020. A/V Redirection for Microsoft Teams is one of the GA features that many have been waiting for.
In this article, I will run through the summary stages of preparing for MS Teams on Windows Virtual Desktop and discuss the tool I have created to streamline the whole process. The tool is a manual function however, I have also created a script for deploying using a Custom Script Extension though Azure's ARM panel. The link and video for this is provided at the end of this article.
The important 2026 update is that Teams Classic is no longer the right deployment target on AVD. The optimization model described here still matters, but the client you should install is New Teams, and on Windows endpoints Microsoft is moving from the older WebRTC-only path toward the newer optimization architecture. I have therefore kept the structure of this article, but updated the risky parts.
High level configuration Steps:
- Prepare
- Apply the WVD required registry key
- Install the C++ Runtime requirement
- Install the Remote Desktop WebRTC Service.
- Install the Teams desktop App
- Review RDP Properties if you are not using media optimization
- Restart
- Check the version for an optimized status
- Test
What is WebRTC-based P2P:
So previously, MS Teams's Audio and Video on WVD was encoded and decoded multiple times before reaching the other end of the call. This method creates latency, that then impacts the performance and quality of the video and possibly the underlining host performance. It is also important to note, that re-encoding on a VM without a GPU is CPU intensive and most often impacts the host and other users logged using the desktop. This does not mean all the problems go away when using a GPU...
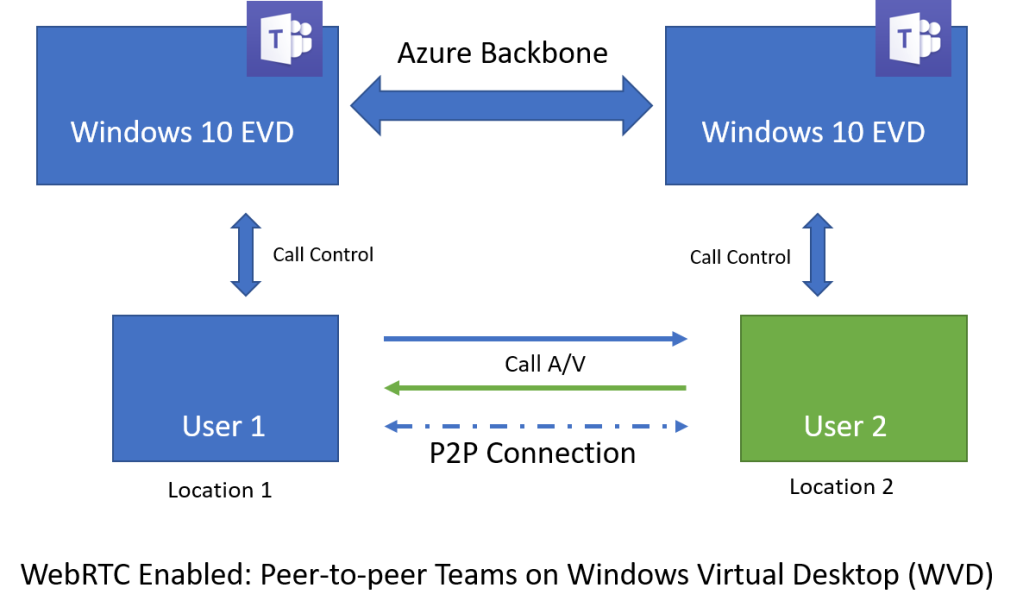
AV redirection for Teams essentially offloads (bypasses) the Window Virtual Desktop Virtual Machine and sends the A/V data directly to the call clients. This provides a better user experience for the WVD users on the Teams call. This method uses the client hardware to encode and decode.
Key points:
- Peer to peer (P2P) - traffic will flow from the user to user device and rendering is completed at the physical endpoint.
- It is also important to note that devices will be redirected using the same hardware device to support better hardware redirection support.
- One key benefit of using a Windows 10 client is the benefits of using the modern media stack including HW video decoding. It has been suggested that you would achieve the best experience using a Windows 10 Client.
WebRTC Diagram for Teams
The diagram below depicts how WebRTC for Teams works using Windows Virtual Desktop.
Preparation for Microsoft teams
The first step (step 1.) is to ensure that all the client devices, firewalls and other security devices do not restrict the following.
| Ports | UDP ports 3478 through 3481 |
| Service endpoints | Use the current Microsoft 365 and Teams network guidance rather than freezing a historic IP list into your firewall rules. |
Bandwidth Requirements:
As with most things these days, ensure that you check, yours's or your customers network before deploying or using Microsoft Teams.
| Bandwidth(up/down) | Scenarios |
|---|---|
| 30 kbps | Peer-to-peer audio calling |
| 130 kbps | Peer-to-peer audio calling and screen sharing |
| 500 kbps | Peer-to-peer quality video calling 360p at 30fps |
| 1.2 Mbps | Peer-to-peer HD quality video calling with resolution of HD 720p at 30fps |
| 1.5 Mbps | Peer-to-peer HD quality video calling with resolution of HD 1080p at 30fps |
| 500kbps/1Mbps | Group Video calling |
| 1Mbps/2Mbps | HD Group video calling (540p videos on 1080p screen) |
Microsoft Official Article covers the various different recommendations.
*Ensure that you use a currently supported Teams client and Windows App / Remote Desktop client combination.
Install pre-requisites
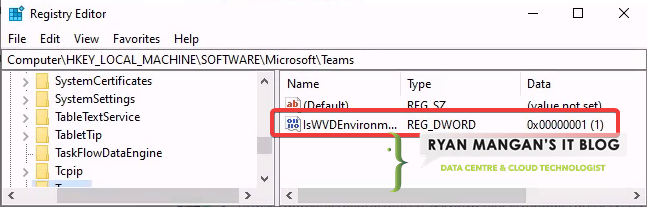
Step 2. Creating the Registry Key:
reg add "HKLM\\SOFTWARE\\Microsoft\\Teams" /v IsWVDEnvironment /t REG\_DWORD /d 1 /f
The following can be run using the Command line or PowerShell. This will add a entry into "HKLM\\SOFTWARE\\Microsoft\\Teams" to identify the host as running in Windows Virtual Desktop.
Step 3. Install the latest Visual C++ runtime
You need to ensure that you have the latest (supported) Visual C++ runtime version. you can download this here: Microsoft Visual C++ Redistribute
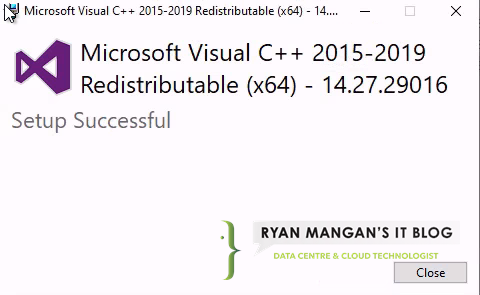
screenshot showing C++ Runtime has been installed Successfully
Check to ensure the runtime has been installed. As shown in the screenshot below, you can see this is now installed on my lab.
Screenshot showing installed C++ runtime.
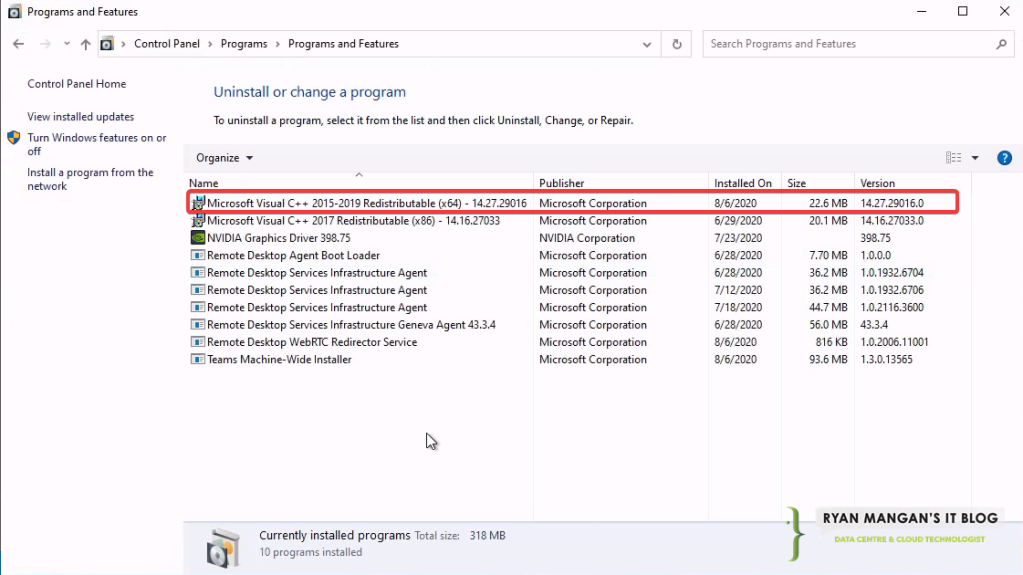
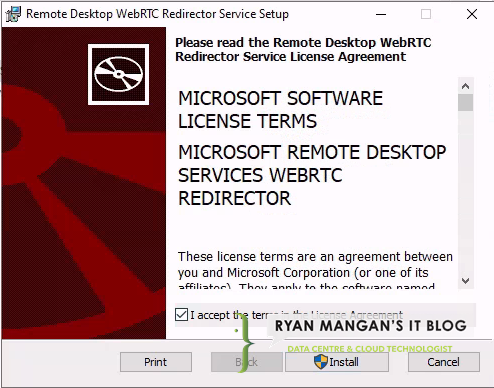
Step 4. Install Remote Desktop WebRTC redirector Service.
The next step is to install the Remote Desktop WebRTC redirector service. This can be downloaded here: WebSocket Service .
Back in 2020 the version floor was 1.0.2006.11001. Today, the safer guidance is simply to use the latest published redirector service and keep it current. Even if you are using the newer optimization path, I still like having the WebRTC Redirector Service installed on AVD session hosts so Windows endpoints can fall back cleanly when needed.
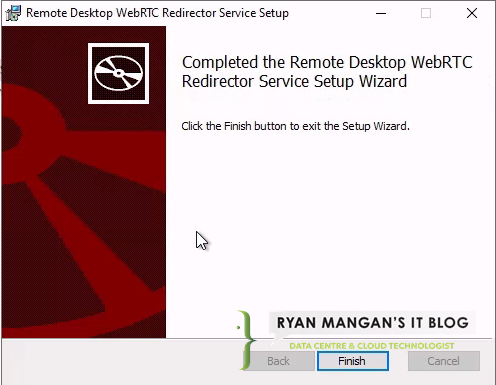
Once the install has completed, check "Programs and Features" or "add and remove programs" to ensure The RD WebRTC redirector service has been installed.
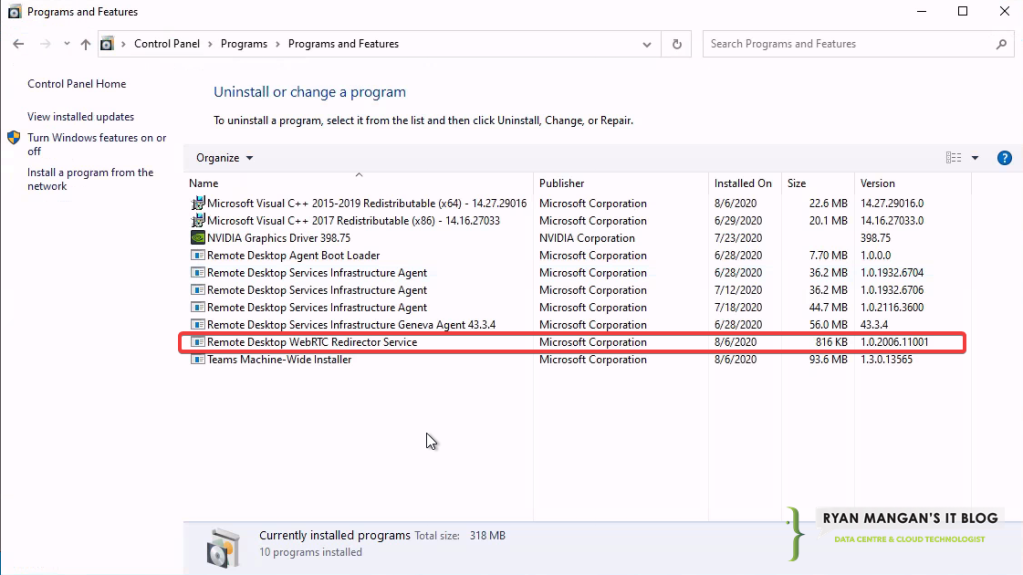
Then check to ensure that the service is shown and is in a running state.
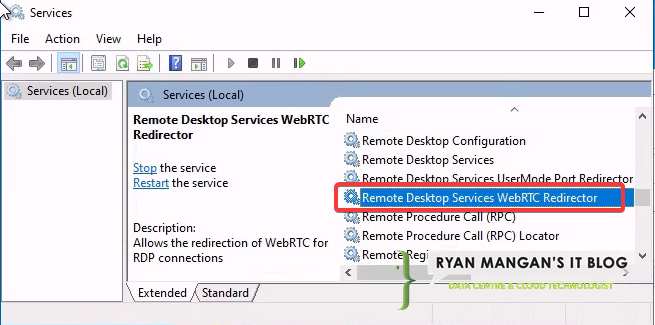
You should also see the "Remote Desktop Services WebRTC Redirector" within "Services".
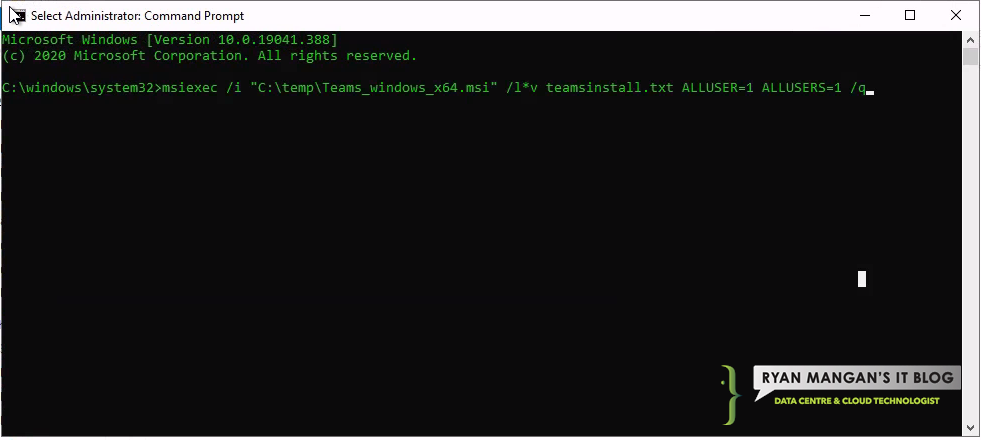
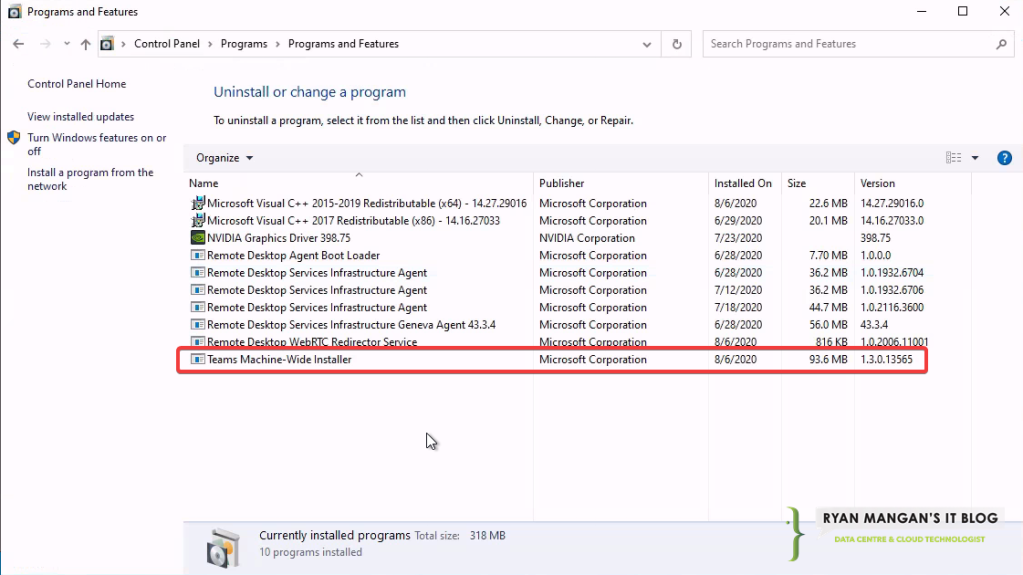
Step 5. Installing Microsoft Teams:
This is the biggest change to the original article. The old per-machine Teams Classic MSI flow is no longer the path I recommend on AVD. Use New Teams instead.
Download the bootstrapper here:
https://go.microsoft.com/fwlink/?linkid=2243204
Then provision New Teams for the machine:
teamsbootstrapper.exe -p
If you are staging the MSIX locally or from a UNC path, use:
teamsbootstrapper.exe -p -o "c:\path\to\teams.msix"
The old msiexec /i Teams_windows_x64.msi ALLUSER=1 ALLUSERS=1 line from this article is now archive material only.
Here is a screenshot showing the cmd I used to install the per-machine install at the time.
You now need to ensure that Microsoft Teams has been installed as machine based.
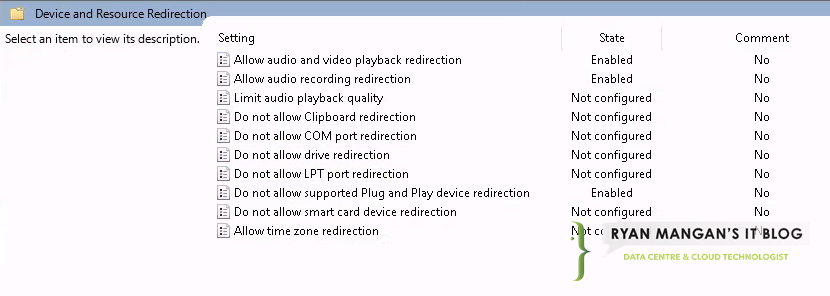
Step 6. RDP Properties (configure device redirection for Teams)
Ensure redirection has been configured on the WVD Host pool:

- audiocapturemode:i:1 (enables audio capture from the local device and redirects audio applications in the remote session.)
- audiomode:i:0 (plays audio on the local computer.)
- camerastoredirect:s:* (redirects all cameras.)
One important correction here: if Teams media optimization is loading correctly, these RDP properties are not the main switch for optimization. They are still relevant when you are deliberately using non-optimized device redirection or troubleshooting fallback behaviour.
You can navigate to your host pools using this link, to add these redirection properties: https://portal.azure.com/#blade/Microsoft_Azure_WVD/WvdManagerMenuBlade/hostpools
You can also use Group Policy to enforce redirection:
Step 7. Reboot WVD Host......
............... ............. ........... ........... .................... .......... .............. ........
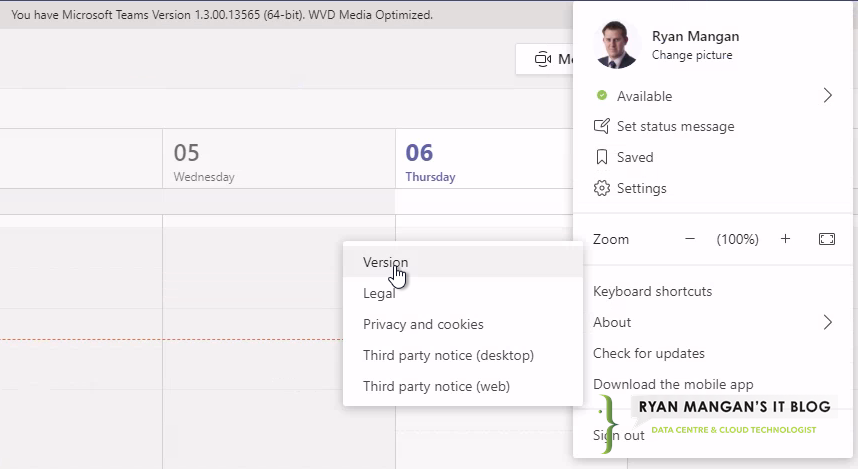
Step 8. Check the version for "WVD Media Optimised" status
If configured correctly and you have rebooted the host..... (see above) you should now see an optimized banner. On current builds that can show as AVD SlimCore Media Optimized or AVD Media Optimized depending on which optimization path is in use.

Screenshot showing "WVD Media Not Connected"
To check if you have configured correctly, click on your Profile icon, then About, and finally Version. This will then show the required information.

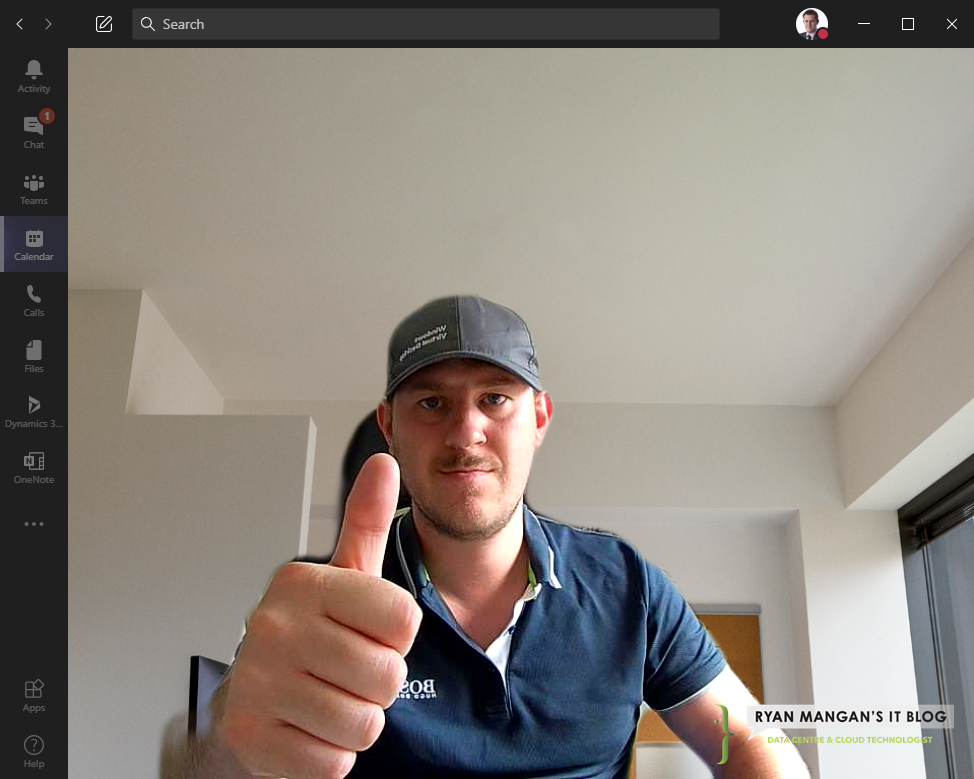
Step 9. Test WVD Teams redirection
As a quick test, I setup a quick join call and as you can see..........
WVD_TEAMSDEPLOY App
To speed up the process of preparing and deploying teams on Windows Virtual Desktop. I have written a tool that completes all the pre-requests, downloads the installers and installs all the required components. All you need to do is ensure you run the application as a admin and you remember to reboot once the install has completed.
https://github.com/RMITBLOG/WVD_TeamsDeploy
Automate using Custom Script Extension
Also see my other blog post that automates the full teams process using a Custom Script Extension. /blog/automate-wvd-teams-deployment-including-webrtc