Load balance a three-tier SharePoint 2013 farm in Windows Azure with the Kemp Virtual LoadMaster, covering cloud service placement.
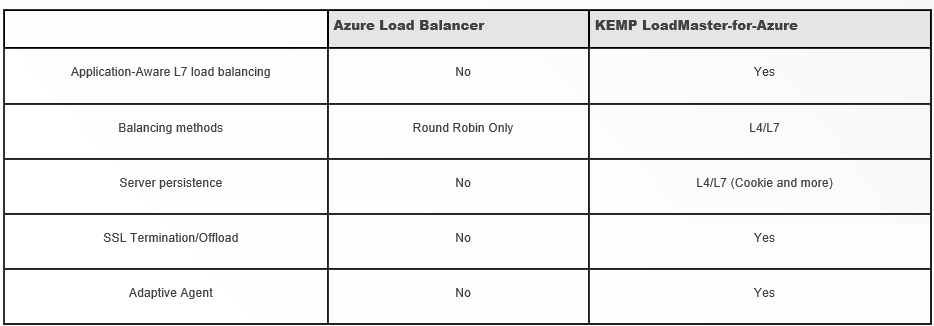
There are a lot of organisations out there like Toyota using SharePoint in Azure. KEMP are the first vendor to offer a layer 7 (application) load balancing product on Azure. I will be showing you how to Load Balance a SharePoint 2013 workload in Windows Azure using KEMP's Azure VLM. KEMP's VLM offers more features than the default Azure Load balancing solution. Please see the table below for the comparison:
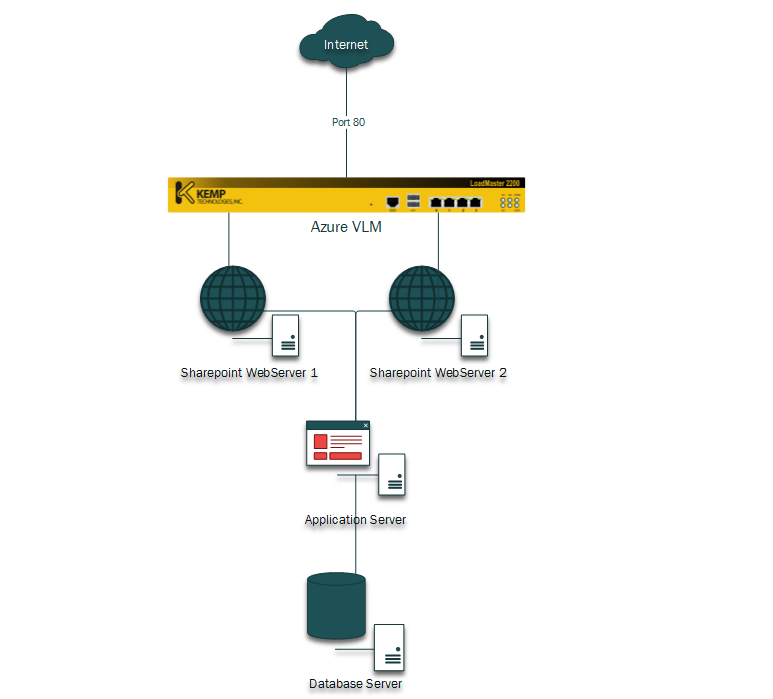
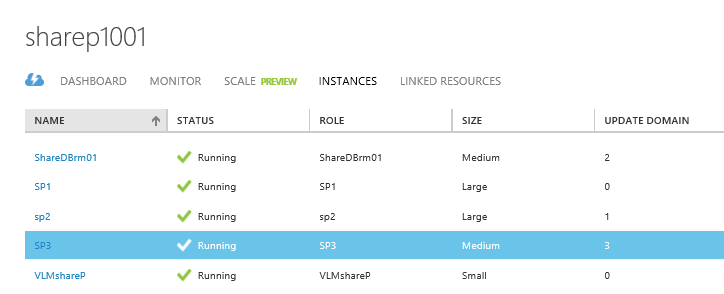
I have a three tier SharePoint 2013 Farm, 2x Web servers, 1x Application Server, and 1x Database Server.
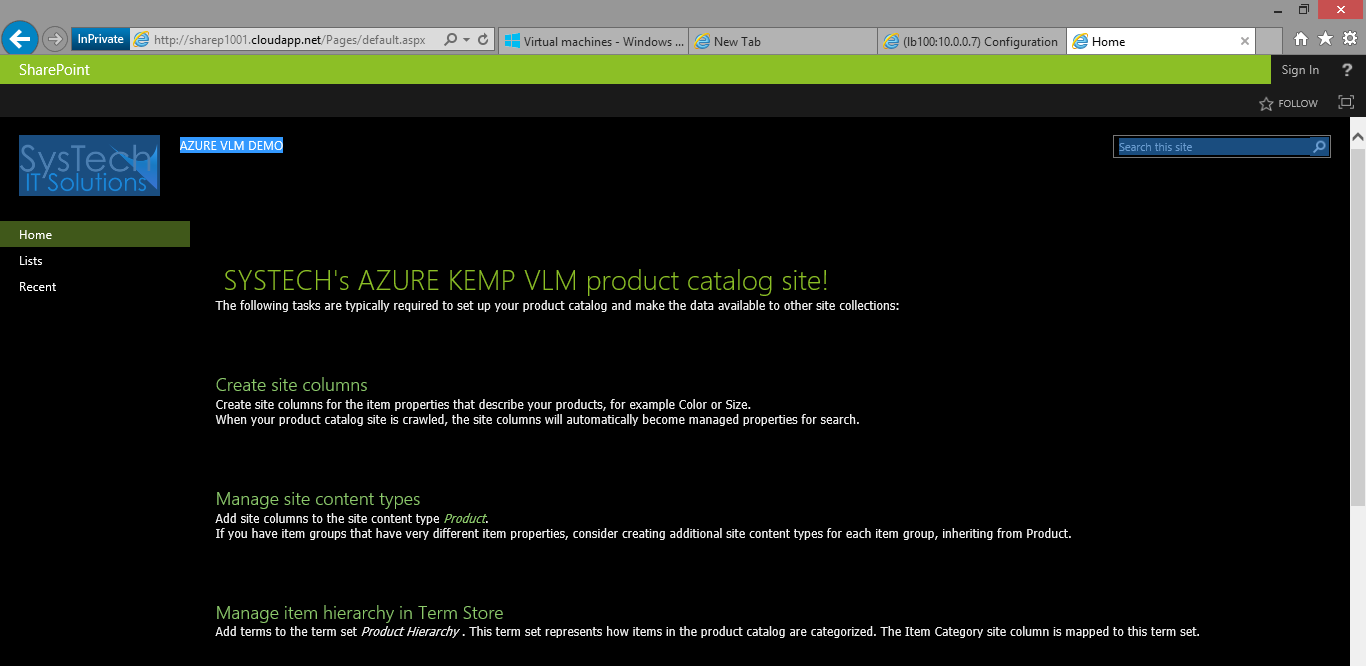
I have created a public product catalogue website called Azure VLM DEMO and configured anonymous permissions for public access.
Configuring the Azure KEMP VLM
You will need to deploy a Azure VLM, please see the following Azure VLM deployment guide: [/blog/kemp-loadmaster-in-windows-azure)
For more info on the basics of configuring the Azure VLM please see http://kemptechnologies.com/load-balancer-for-azure
You will need to deploy the VLM into the same Cloud Service as your SharePoint workload.
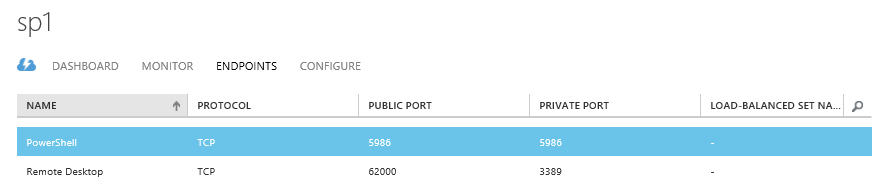
"It is also important to note that none of the SharePoint VM's will have (port 80) ENDPOINTS configured as they wont be published directly to the internet." The KEMP LoadMaster will be public facing...
SharePoint Server Endpoints:
VLM Endpoints:
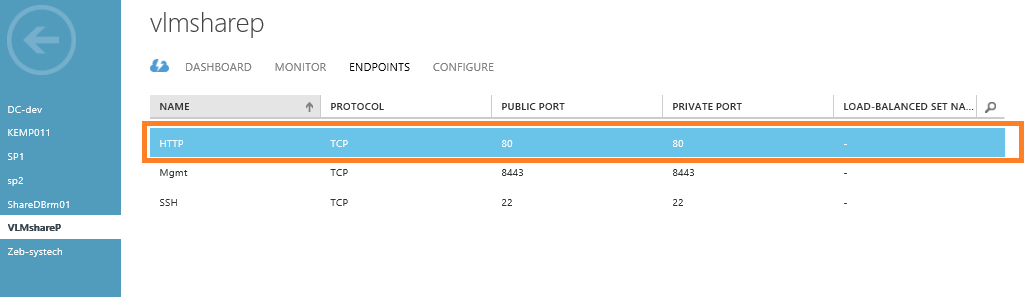
Add port 80 to the VLM Endpoints
New Virtual Service:
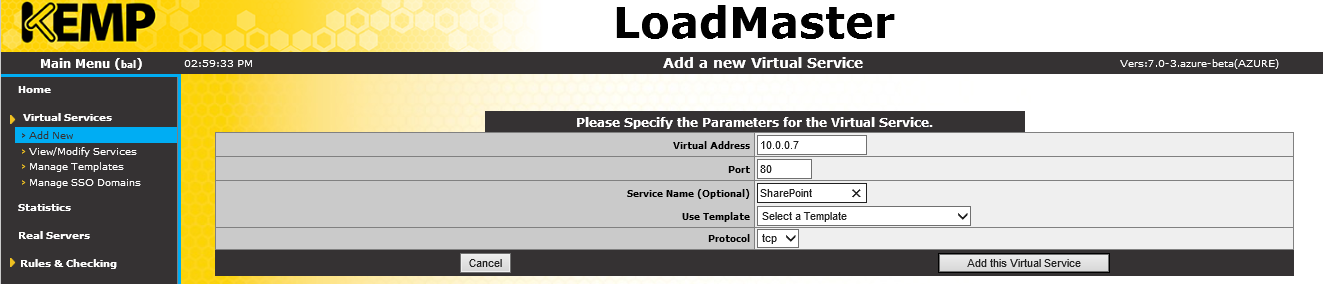
Create a new Virtual Service, The virtual address will be the same as the loadmasters IP address. "This cannot be changed" You will need to deploy a VLM for each cloud service you want to load balance.
Enter the service name and the port you are wanting to use. In this case we are using port 80. Once you have populated the required fields select the Add the Virtual Service.
Basic Properties:

Standard Options:
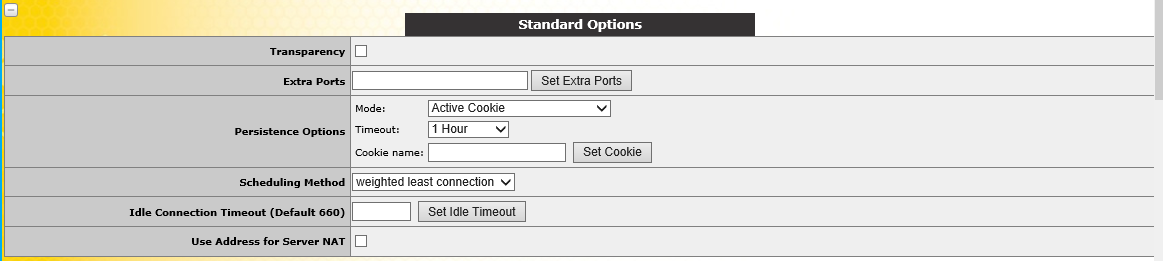
Make sure the option for Transparency is un-ticked.
By default when creating a virtual service on the LoadMaster, Layer 7 Transparency is turned on. This will cause the pass-through authentication to fail. Disabling Layer 7 Transparency fixed the issue.
Persistence options: Mode: Active Cookie and a timeout of 1 hour.
Scheduling Method: Weighted least connection
Real Servers:
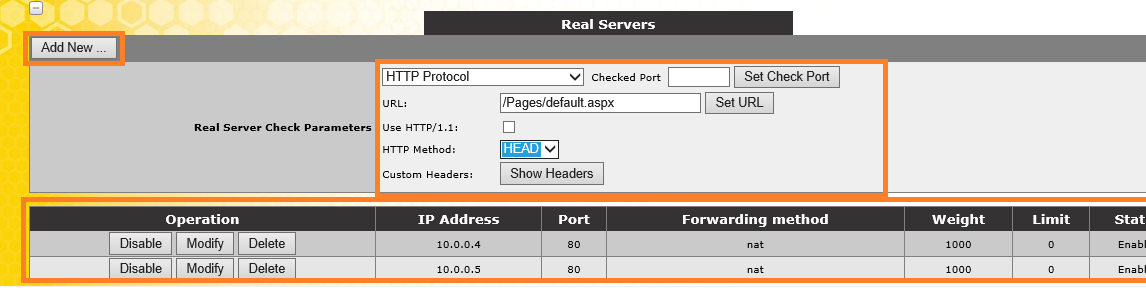
To add the SharePoint Web server IP address's you need to add them by selecting Add New ... located in the top left hand comer of the Real Servers option.
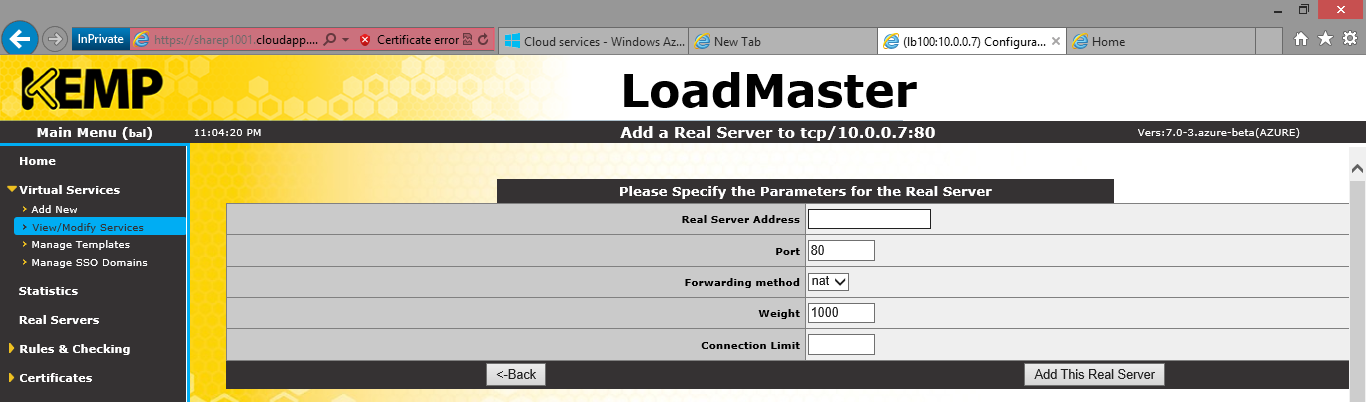
Add the SharePoint web servers IP address's.
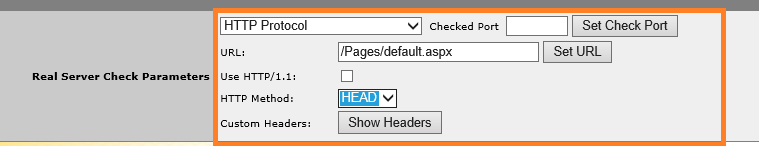
Configure checking.
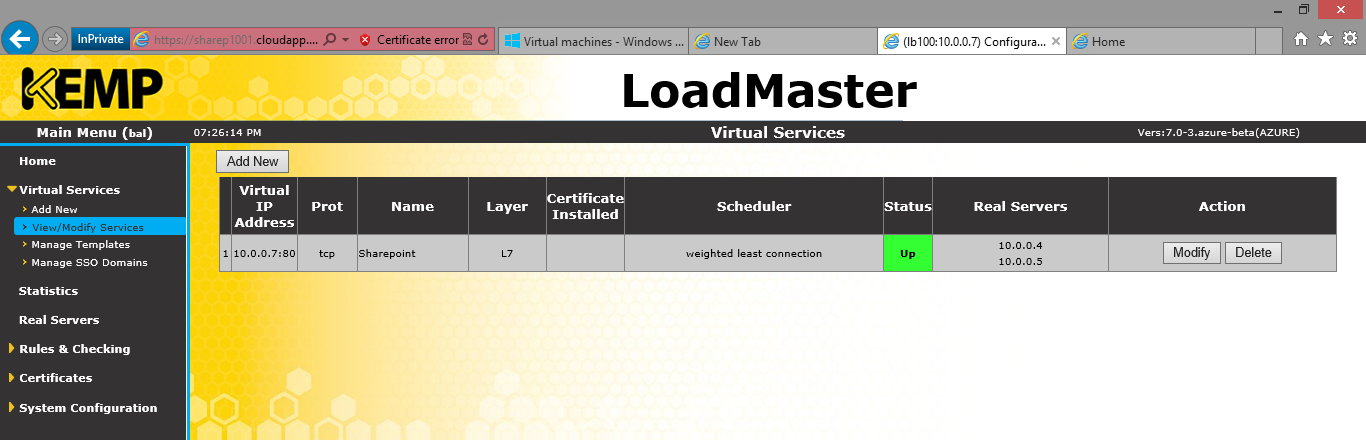
Check the virtual service to see the status.
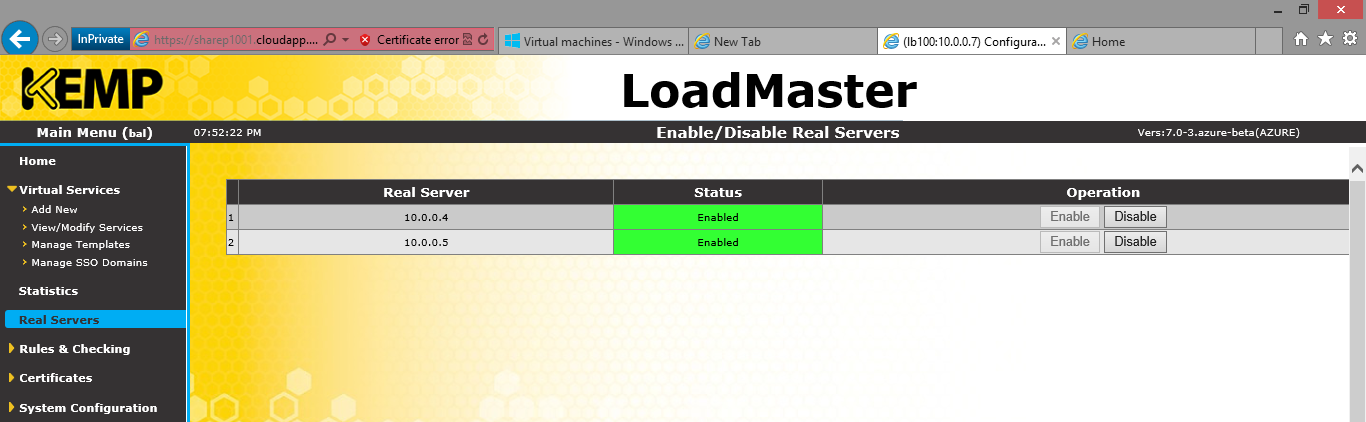
Check the Real Servers to ensure all servers are up.
There you have it, a SharePoint farm on Azure published with the Kemp VLM for Azure.
All you need to do is configure your DNS using a CNAME to point the service to a domain of your liking.
SharePoint 2013 Farm Load Balanced using a KEMP Azure VLM 100.
Any questions feel free to comment.