This guide will show you how to deploy RDS 2012 on a single 2012 Server enabling the use of Remote Desktop Sessions and RemoteApps.
This guide will show you how to deploy RDS 2012 on a single 2012 Server enabling the use of Remote Desktop Sessions and RemoteApps.
Point to note: This demonstration shows how to deploy RDS using Quick start. I will demonstrate how to deploy RDS using Standard deployment in a later post.
Preparing for RDS 2012
Before I Install RDS 2012, I will create the OUs and Security Groups required for my deployment. This will make the configuration of group polices easier later.
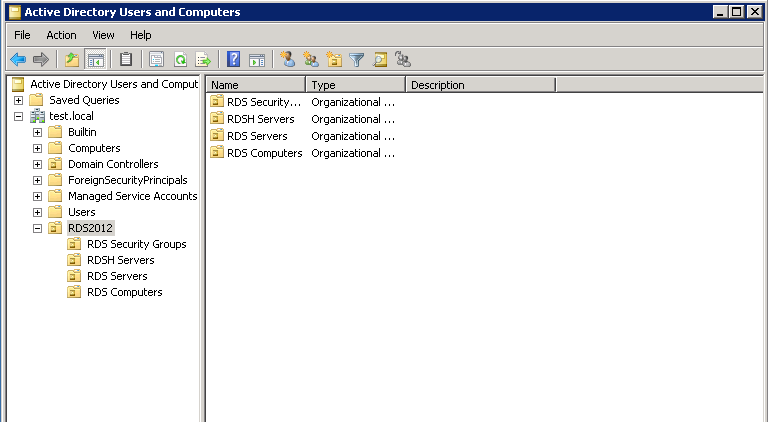
OU's
- RDS Security Groups
- RDSH Servers
- RDS Servers
- RDS Computers
I have also created the following Security Groups for RDS
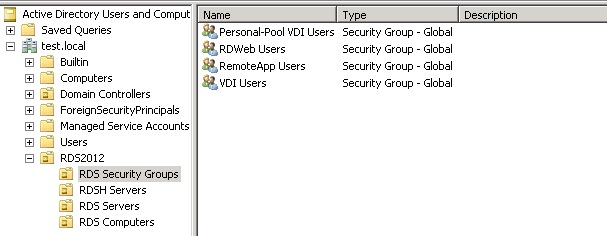
- Personal-Pool VDI Users : Remote desktop users with allocated Virtual desktops
- RDWeb Users: Remote desktop web users
- RemoteApp Users: Remote App users
- VDI Users: Virtual desktop users
There is no requirement to setup OU's and security groups like I have done, but I would recommend doing so to improve the manageability of your RDS deployment.
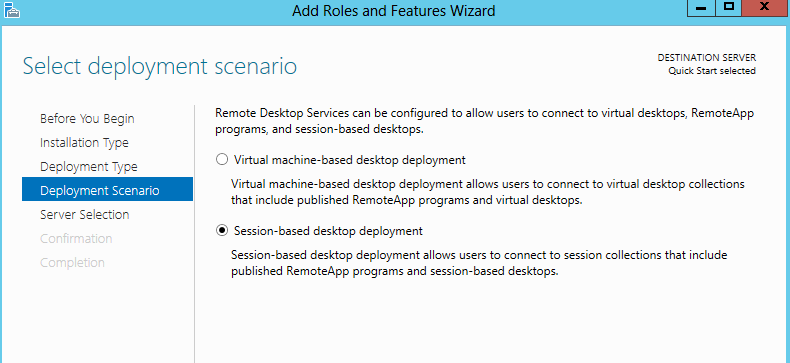
Installing RDS - Session Based deployment
It is important to know that you can only have A Remote Desktop session or RemoteApps Session per Session Collection. There is a workaround (not supported) for this and is covered at the end of this post.
Installing RDS Single Server - Session Based Deployment:
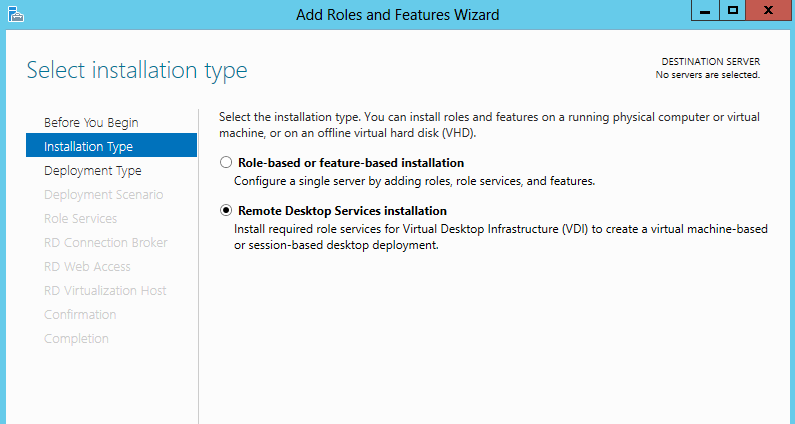
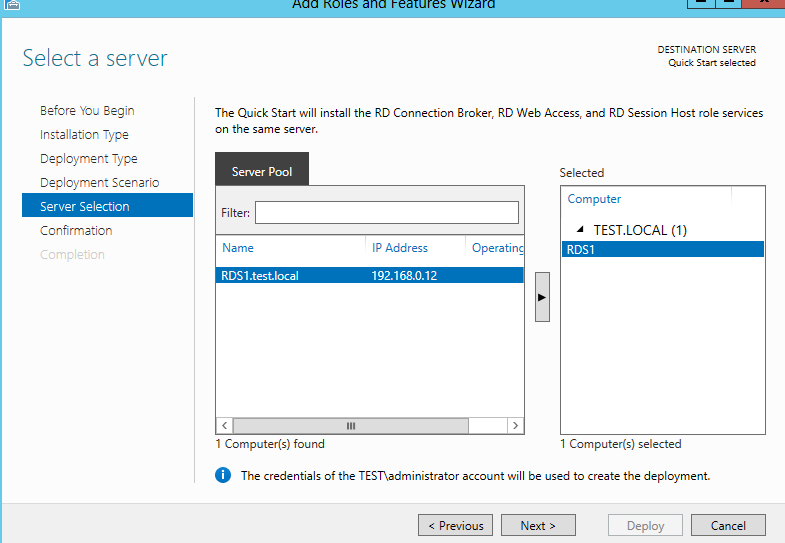
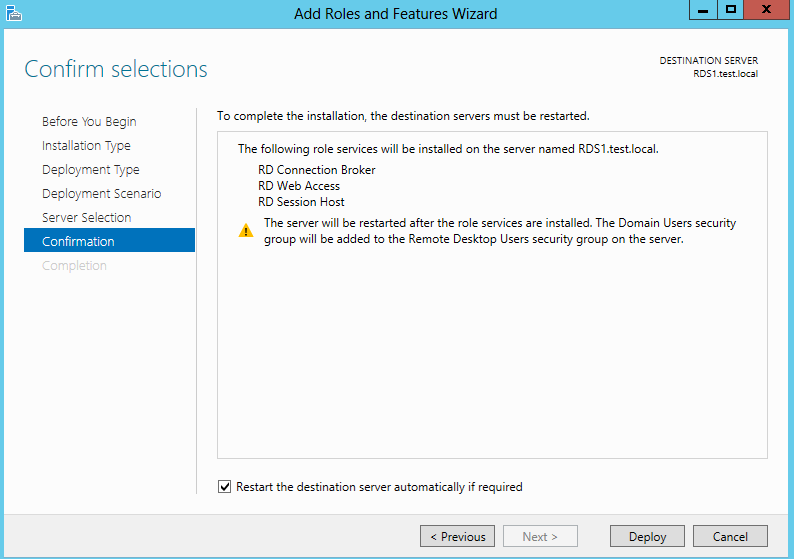
Open Server Manager > Add Roles and Feature Wizard
Installation type > Remote Desktop Services Installation
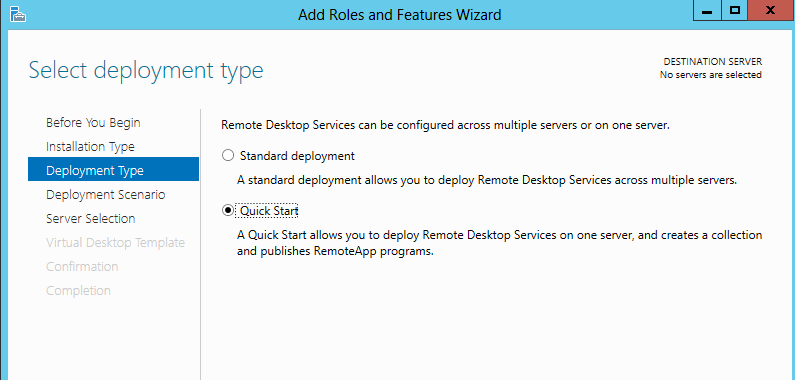
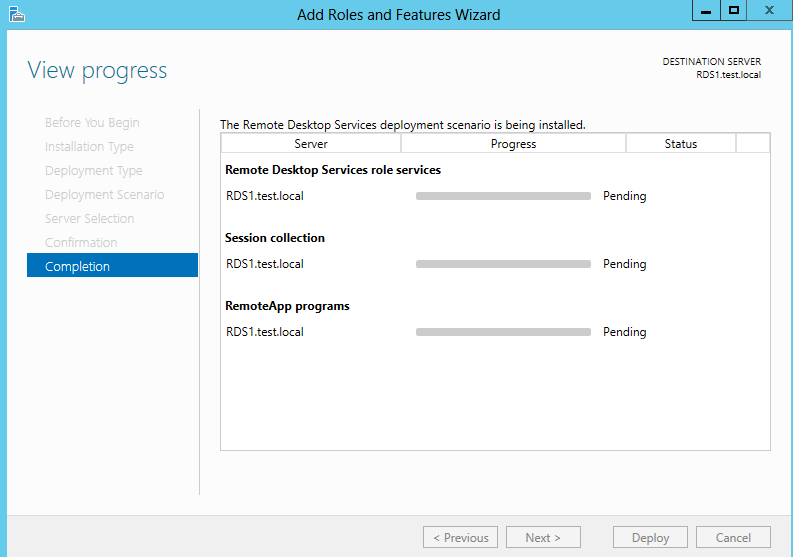
Quick install allows you to deploy a RDS platform and create a session collect straight from install.
Installing RDS Session Deployment using PowerShell
Installing the Server Roles:
New-SessionDeployment -ConnectionBroker RDS1.test.Local -WebAccessServer RDS1.test.Local -SessionHostRDS1.test.Local
Creating the Session collection for Desktop Sessions:
New-RDSessionCollection -CollectionName TestSessionCollection -SessionHost RDS1.test.Local -CollectionDescription “Demo Collection" -ConnectionBroker RDS1.test.Local
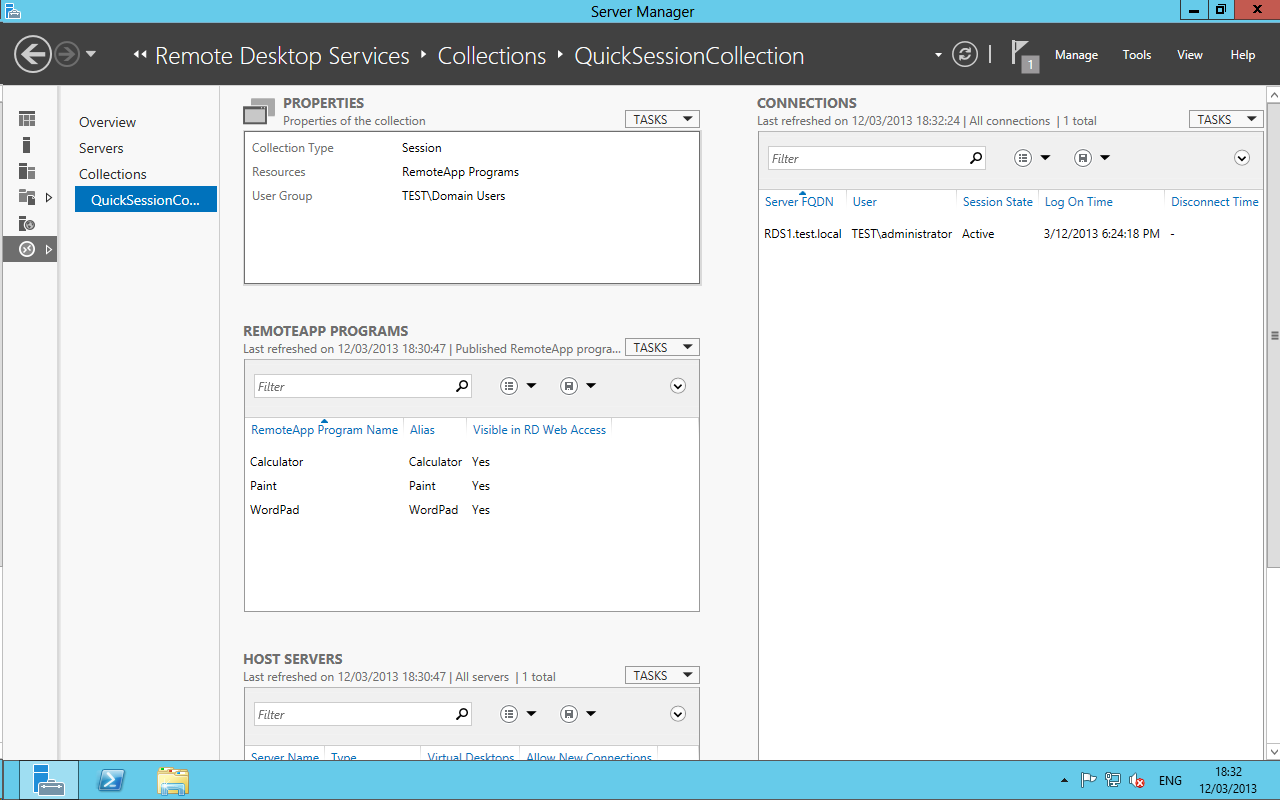
Creating a RemoteApp:
new-rdremoteapp -Alias Wordpad -DisplayName WordPad -FilePath "C:\Program Files\Windows NT\Accessories\wordpad.exe" -ShowInWebAccess 1 -collectionname TestSessionCollection -ConnectionBroker RDS1.test.local
Post Install
After installing the RDS roles, you will need to then configure the RDS Certificates that will be required for access via the endpoint/client device. please see the following link for the configuration of RDS Certificates: Configuring RDS Certificates and SSO
Once the RDS installation is complete, you will see RDMS and this is where you can manage your RDS environment.
Adding Remote Desktop session to a RemoteApp session Collection
I mentioned earlier that you could only have a Remote Desktop Session Collection or a RemoteApp Session Collection.
There is a workaround for this and its easy to configure. you can also look at the following link which shows you how to enable this through the registry:
Publish Remote Desktop Session in a Remote App Session Collection
It is also important to note that there is a issue using both remote apps and desktop sessions on the same server, please see the following link for more details:
RDS 2012 R2 Apps and Session’s using UPD Issue
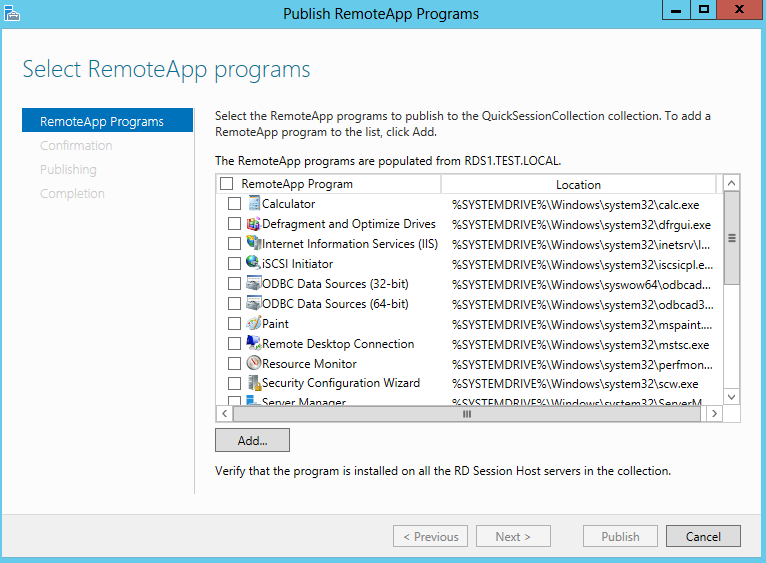
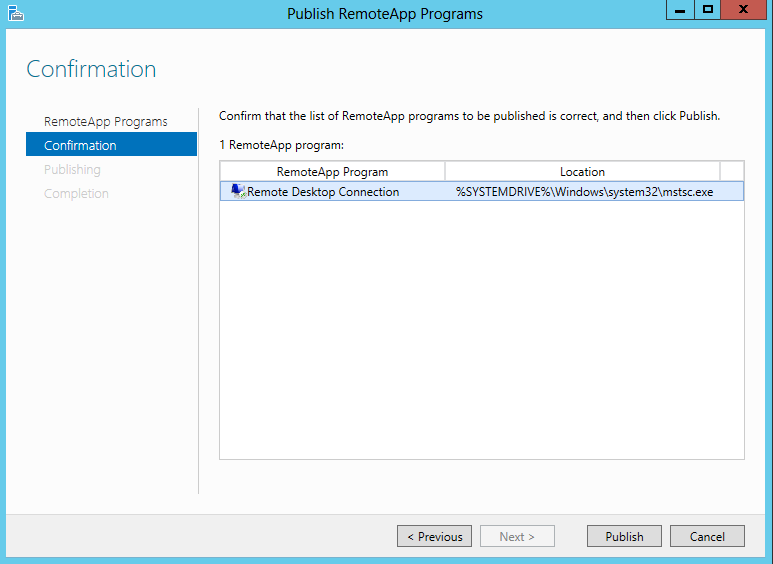
To publish a Remote Desktop Session you would need to navigate to RemoteApp Programs and select tasks.
Tasks > Publish RemoteApp Programs
Select Remote Desktop Connection
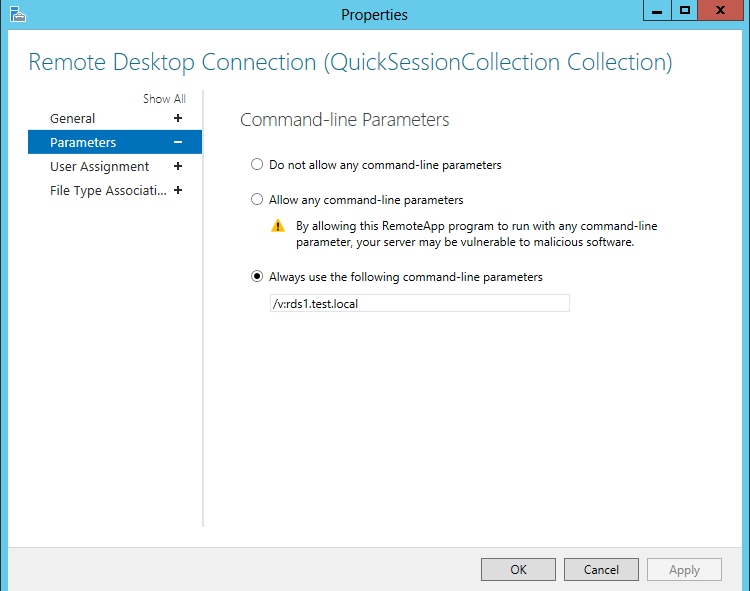
In the field: "Always use the following command-line parameters"
Enter the following:
/V:
/V:RDS1.test.local
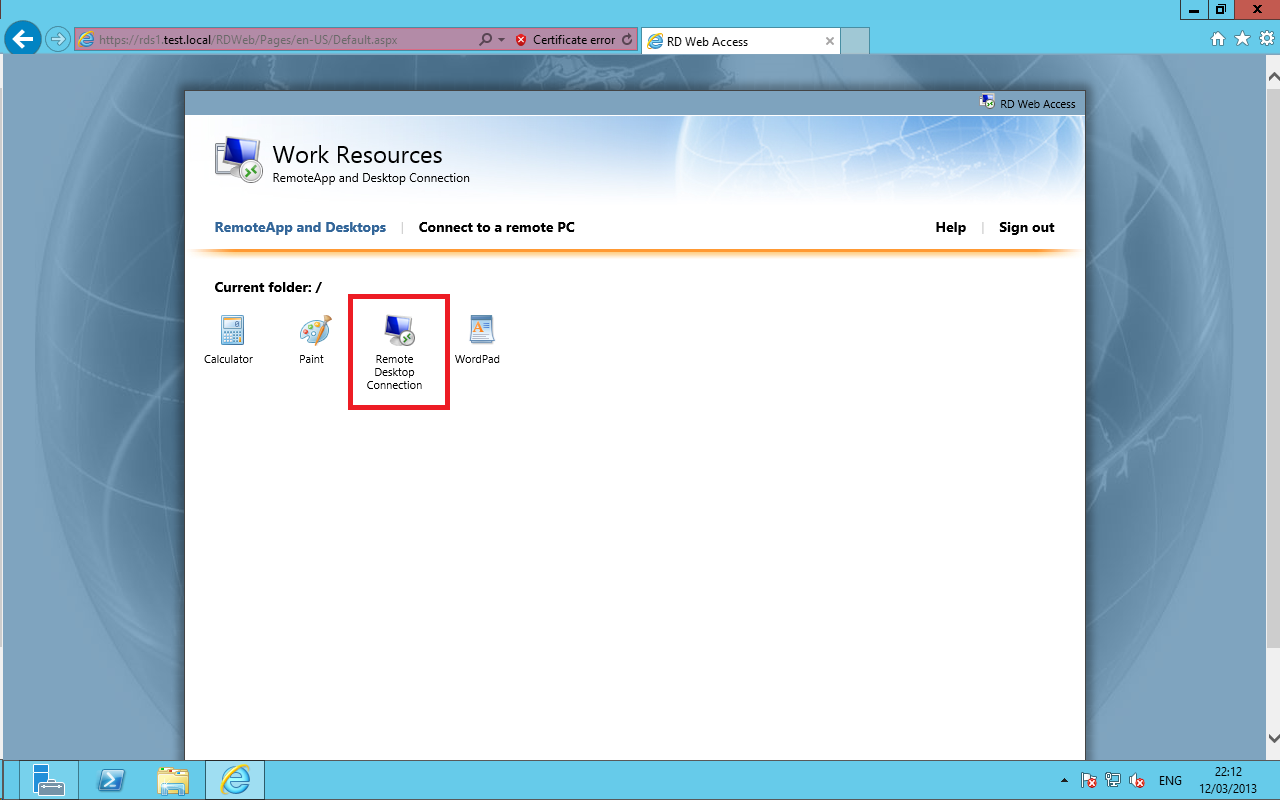
There you have it, a single Server deployment with RemoteApps and Remote Desktop Sessions.