How to request and create a Subject Alternative Name certificate covering every Remote Desktop Services 2012 role name clients connect to.
When configuring a RDWA Farm, Connection broker HA or Gateway Services it is recommended that you use a SAN or Wild certificate.
SAN certificates allow you to use alternative names providing alternative name resolution for internal and external connections.
Please see the following Link http://www.cacert.org for Free certificates. I would recommend purchasing certificates for production environments.
Open MMC > add snap in > select Local computer certificates.
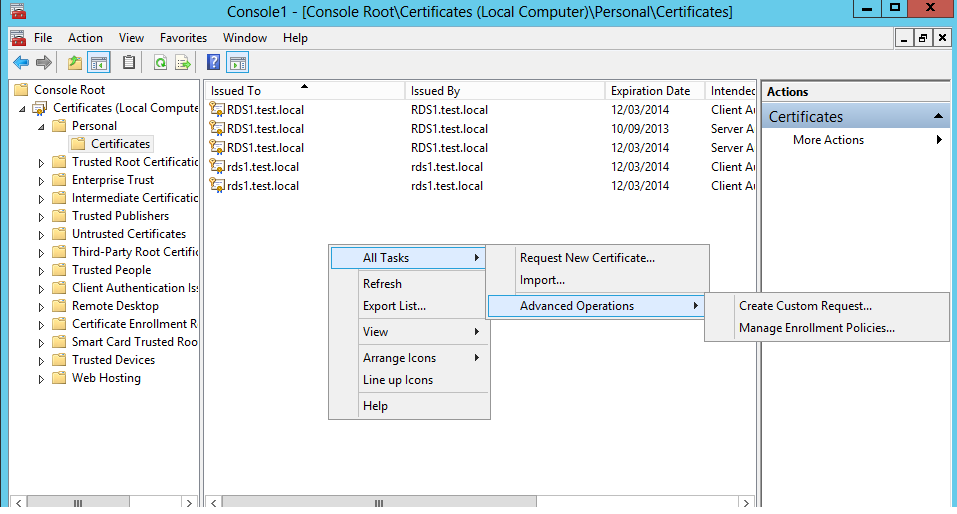
Right click > All Tasks > Advanced Operations > Create Custom Request
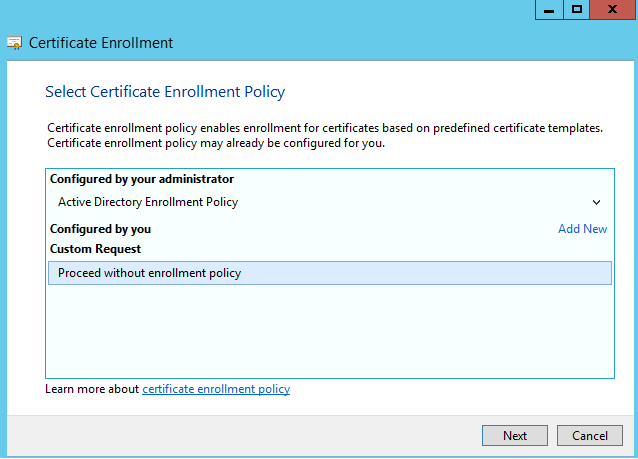
Ensure that you select Proceed without enrollment policy
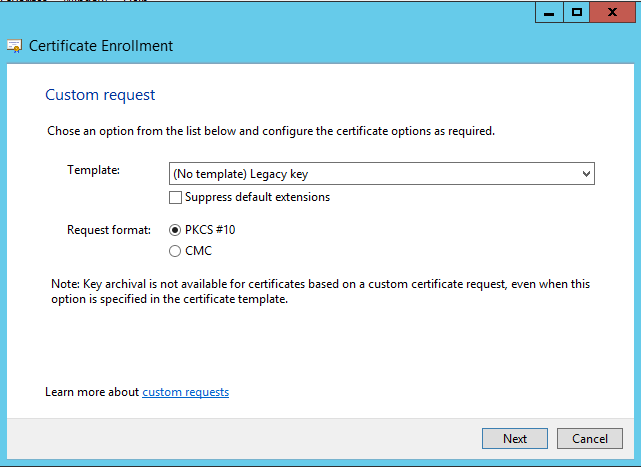
Select Legacy Template Key and PKCS#10
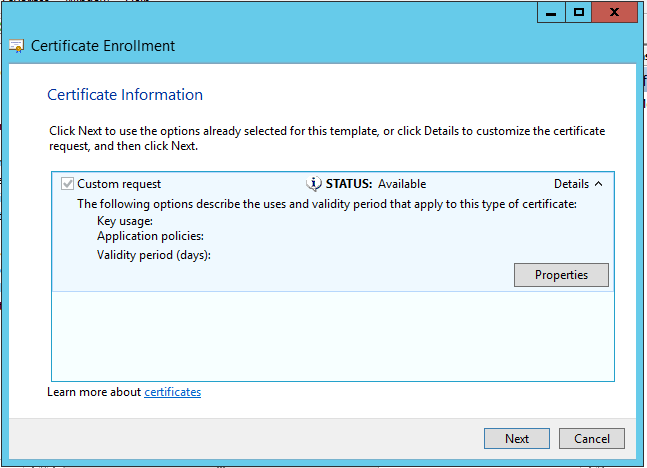
Configure the properties.
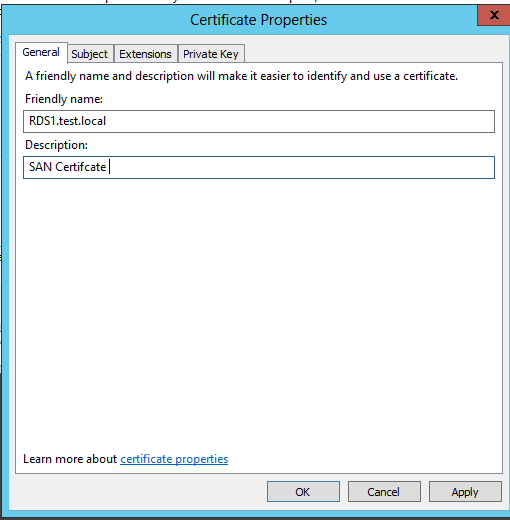
Enter a friendly name for the certificate and a description .
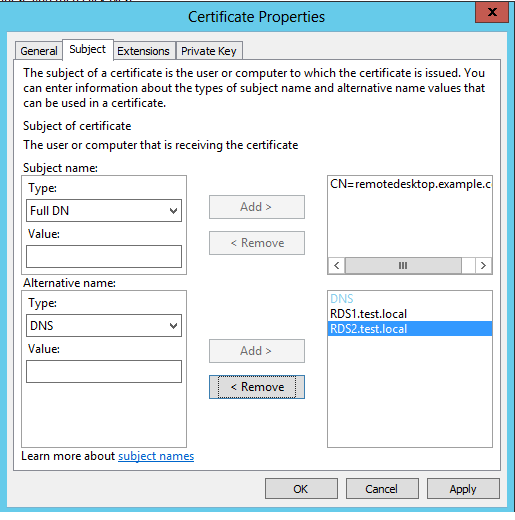
Creating the Subject Name of the SAN Certificate
To create the san certificate, you would need to enter the following fields into the subject name.
CN=remotedesktop.example.com
OU=example company
O=IT
POBox=
STREET=downing street
STREET=
STREET=
L=
S=
PostalCode=
C=
Email=
Phone=
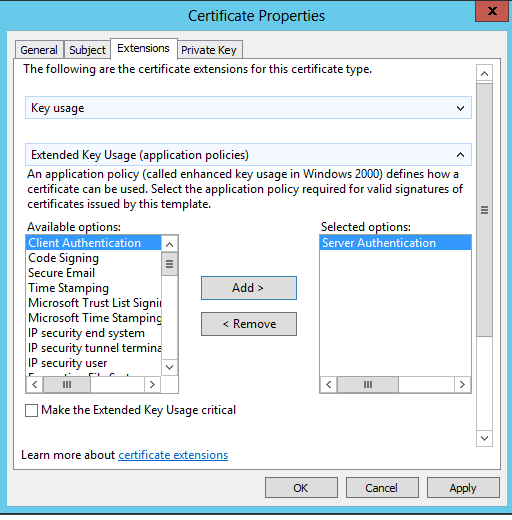
Add Server Authentication to the selected options
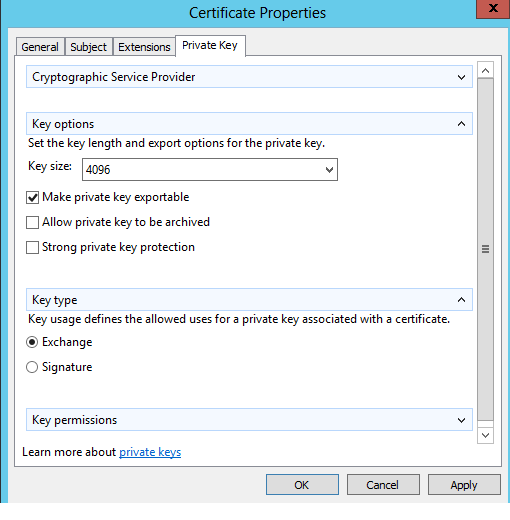
select a Key Size of 4096 and a key type of Exchange Type
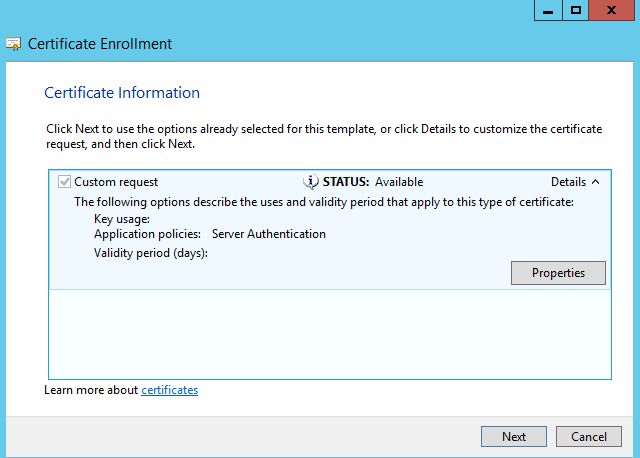
Click Next after configuring the certificate
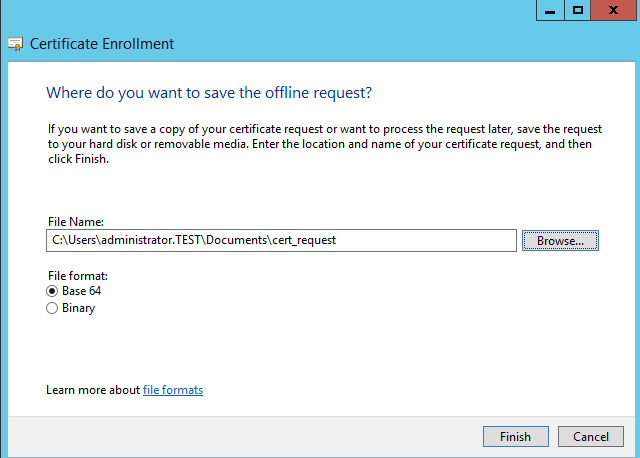
Save the request file to a location of your chose.
You can check your CSR using the following tool https://secure.comodo.net/utilities/decodeCSR.html